Turn and Spin

The Turn and Spin tool allows you to create a 3D component by turning or spinning a cross section (an open vector)
Turn
Turn takes a profile and turns (rotates) it around line from start point to end point to create a rounded symmetrical shape. To turn a shape select the vector cross section you want to turn and use the Turn (Rotate) option, this cross section should represent the silhouette of the shape you wish to create. You can click to create your 3D turned shape.
Turn Example 1

Vector Cross Section to Turn around line from Start Point to End Point
Direction the Vector Turns Looking up the X Axis
Result of Turned Shape in 3D View
Turn Example 2

Vector Cross Section to Turn around line from Start Point to End Point
Direction the Vector Turns Looking up the X Axis
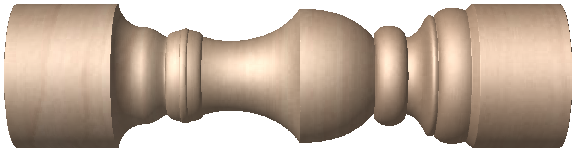
Result of Turned Shape in 3D View
Turn Example 3

Vector Cross Section to Turn
(Blue) around line from Start Point to End Point (Red)
Direction the Vector Turns Looking Down the Z Axis
Result of Turned Shape in 3D View
Spin
Spin takes a profile and spins it around the left end point of the cross section to create a circular component based on the profile shape of your cross section. To spin a shape select the vector cross section you want to spin around the left end point and click to create your 3D spun shape.
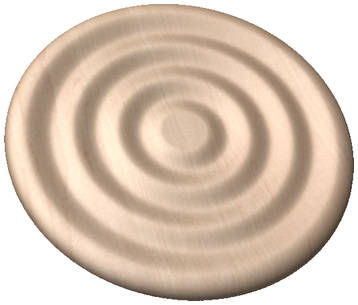
Spin Example 1

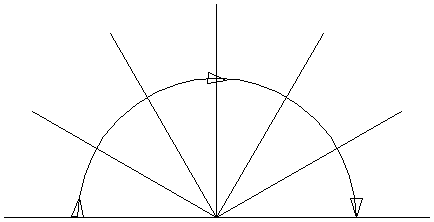
Vector Cross Section to Spin around Left End Point
Direction the Vector Turns Looking down the Z Axis
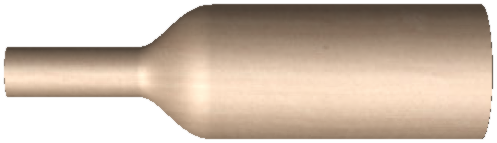
Result of Spun Shape in 3D View
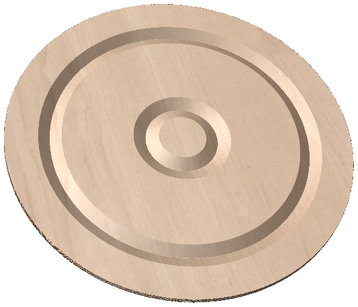
Spin Example 2

Vector Cross Section to Spin around Left End Point
Direction the Vector Turns Looking down the Z Axis
Result of Spun Shape in 3D View
Spin Example 3
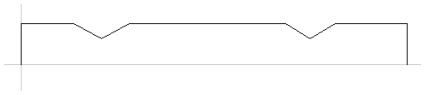
Vector Cross Section to Spin around Left End Point
Direction the Vector Turns Looking down the Z Axis
Result of Spun Shape in 3D View

Scale to Exact Height
Checking ✓ this option scales the shape calculated so its maximum height is the value entered in the Height area of the form.
Common Modeling Options
All four of the main modeling tools in the software use a common set of commands to assign a name and combine mode to the component being created along with options to apply the settings in the form, reset the shape, start creating a new component and close to exit the function.

Combine with other components...
This section includes options to allow you to name your Component and control the way it will be combined with other objects in the Component Tree. See Component Management from within a modeling tool for more information.
Reset
Clicking the button will remove the current shape, doing this before you the form will ensure that a component is not created from the current selection. Clicking this does retain the current set of selected vectors.
Apply
Clicking the button will create a shape based on the settings you have chosen. You can make edits to the different parameters that control the function and continue to hit to update the current component until you are happy with it.
Start New Component
Clicking the button will create a component based on the current applied settings and deselect all the vectors to allow you to start the selection process to make a new component. The Component will be added to the Component Tree but the software will stay within the form so you will not see this until you have finished creating shapes with this function and hit the Close button.
Close
Clicking the button will close the form returning to the Modeling Tab icons and the updated Component Tree reflecting any changes that you have made. If you wanted to remove the shape you just created then you can hit the Undo icon or use the keyboard shortcut to undo, CTRL+Z or simply Right Click the component in the Component Tree and use the delete option.